Liveness Probe Exercise
In this exercise a simple demo application is used. The demo app allows the simulation application states such as being healthy or unhealthy as well as behavior such as long startup durations.
First, the application's default behavior is examined.
60-deployment-lvn.yml:
apiVersion: apps/v1
kind: Deployment
metadata:
  name: adv-pod-conf-depl
  labels:
      app: adv-pod-conf
spec:
  selector:
    matchLabels:
      app: adv-pod-conf
  replicas: 3
  template:
    metadata:
      labels:
        app: adv-pod-conf
    spec:
      containers:
      - name: adv-pod-conf-con
        image: fischerjulian/apc-demo-app:0.6.0
        ports:
          - containerPort: 4567
        env:
          - name: MY_POD_IP
            valueFrom:
              fieldRef:
                fieldPath: status.podIP
        livenessProbe:
          httpGet:
            path: /healthz
            port: 4567
          initialDelaySeconds: 3
          periodSeconds: 3
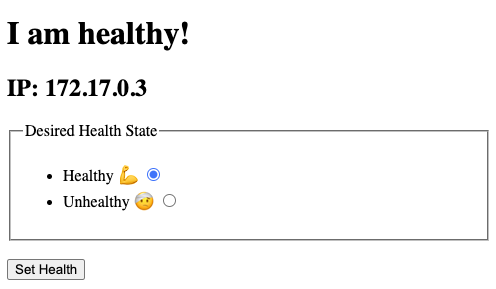
Per default, the application starts without a delay and enters a healthy state. It offers a simple UI showing the IP address of the particular Pod which served the request. Furthermore, it provides a simple form to set the health state to either Healthy or Unhealthy. HTTP response codes to the /healthz endpoint depend on this health state. The response code will be 200 if set to Healthy and some HTTP error code if set to Unhealthy. This allows us to simulate failing pods by changing their health state. The health state is stored in the pod's ephemeral file system. When using with a Service load-balancing across several replicas of a Deployment, the health state affects only the particular pod which served the request. In other words, you can make a particular pod of a Deployment's ReplicaSet fail.
In a real world example, the purpose of the /healthz would be to make an educated guess about the application's true health. An application still running application server process but which lost its ability to serve requests, for example.
An httpGet Liveness Probe to poll the /healthz endpoint can be used:
livenessProbe:
  httpGet:
    path: /healthz
    port: 4567
  initialDelaySeconds: 3
  periodSeconds: 3
This Liveness Probe will wait for 3s as configured with initialDelaySeconds before executing the first probe. This allows the application to set up and start serving requests. After the initial delay, the Liveness Probe will be repeated every periodSeconds, in this case every 3s.
Whenever the Liveness Probe fails, Kubernetes (the Kubelet on the Node) will consider the corresponding pod to have failed. Depending on the pod's restartPolicy [1], the pod will be restarted.
While a restart may not resolve the underlying issue, in many cases it will recover a failed Pod by replacing it with a functioning one. This may buy the time for the engineers to sleep through the night and take care of the issues as a regular work item rather than an expedited one.
Exercise: Mark a Pod as Unhealthy
See for yourself and mark a Pod as Unhealthy. Within the periodSeconds the failure should be detected and you should see a restarting pod.
NAME                                READY   STATUS    RESTARTS   AGE
adv-pod-conf-depl-9b6f56758-42pjv   1/1     Running   0          84m
adv-pod-conf-depl-9b6f56758-gc9fr   1/1     Running   0          84m
adv-pod-conf-depl-9b6f56758-gphjm   1/1     Running   0          84m
After a few seconds a pod restart can be observed.
NAME                                READY   STATUS    RESTARTS   AGE
adv-pod-conf-depl-9b6f56758-42pjv   1/1     Running   1 (0s ago)   84m
Look at the pod's details using this command:
kubectl describe pod adv-pod-conf-depl-9b6f56758-42pjv
Revealing the livecycle event of a failed Liveness Probe:
Events:
  Type     Reason     Age                From     Message
  ----     ------     ----               ----     -------
  Warning  Unhealthy  88s (x3 over 94s)  kubelet  Liveness probe failed: HTTP probe failed with statuscode: 403
Conclusion
In this exercise you have witnessed extended self-healing capabilities of Kubernetes pods. While - per default - a pod is restarted if one of its container processes exits with a non-zero return value, Liveness Probes provide a mechanism to define custom probes to detect failed applications beyond their container process exit codes. In this example, you have used the httpGet variant of the Liveness probe but there are also other probing mechanism that you may want to discover yourself. Standard probing mechanisms work similar for Livess, Readiness and Startup Probes and include:
exec- Execute a probing command within the container using the command's exit code as a result with0indicating success.httpGet- Perform an HTTP requests using the HTTP response code to determine success. Success is assumed with response codes between200and anything below400.tcpSocketExecutes a TCP check against the pod's IP address on the specified port. The diagnostic is considered successful if the port is open.grpc- Performs a remote procedure call using gRPC.
See [2] and [3] for more details about Container Probes.
Sources and Links
- Kubernetes Documentation / Concepts / Workloads / Pods / Pod Lifecycle # Container restart policy, https://kubernetes.io/docs/concepts/workloads/pods/pod-lifecycle/#restart-policy
- Kubernetes Documentation / Tasks / Configure Pods and Containers / Configure Liveness / Readiness and Startup Probes / Configure Liveness / Readiness and Startup Probes, https://kubernetes.io/docs/tasks/configure-pod-container/configure-liveness-readiness-startup-probes/
- Kubernetes Documentation / Concepts / Workloads / Pods / Pod Lifecycle # Container Probes, https://kubernetes.io/docs/concepts/workloads/pods/pod-lifecycle/#container-probes